

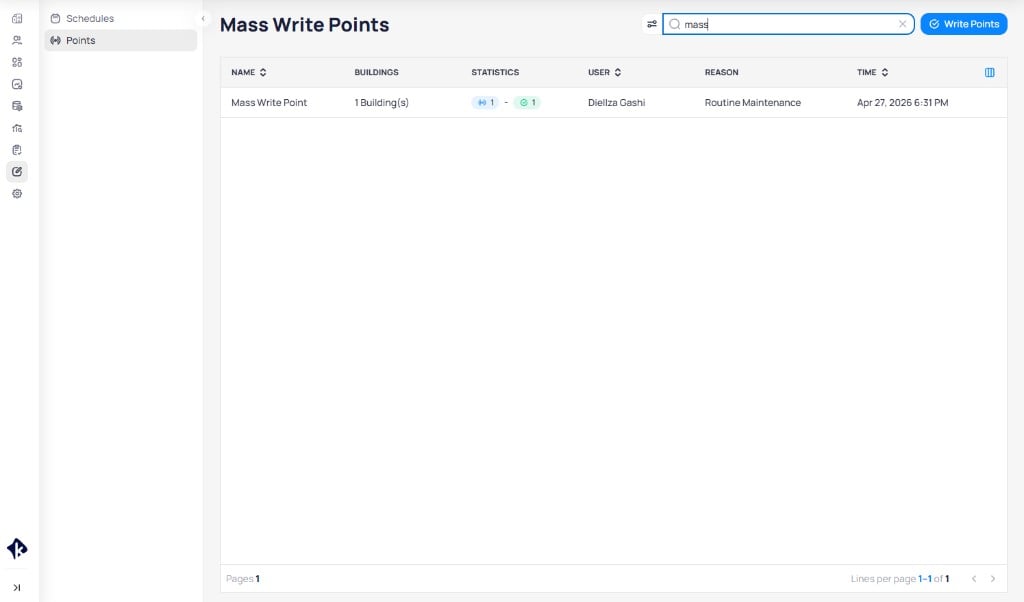
The Mass Write Points page showing previous jobs with their status, building count, and reason
Enable mass write access
Mass write permissions must be activated on the user’s KODE OS role before the module appears.Open role settings
Launchpad > Apps > Cloud BMS > Roles and select the role you want to update.Enable permissions
Save the role
Save. Users with this role see the Mass Write module in the portfolio view.Mass write points
Use mass write points to send values to multiple writable points across buildings simultaneously.Command actions and priority levels
Cloud BMS uses a BACnet-inspired priority model for writable points. The same command dialog appears for BACnet and non-BACnet integrations, such as REST API thermostats. How each action maps on the device depends on the connector.BACnet points that accept commands have 16 priority levels (1 is highest, 16 is lowest). When every level is empty (null), the point uses a fallback / default value (Relinquish_Default in BACnet). That fallback is not a 17th BACnet priority. Some interfaces label it as level 17 for display only.Override and Set turn different knobs under the hood, even when the visible value looks the same.Override, Auto, and Set borrow Niagara-style action names. Release is a Cloud BMS action that clears a Set.In Niagara-style control, Set keeps a non-null fallback so sequences and logic keep a reliable baseline. Use the priority array (including Override) for programmed automation and temporary exceptions.To make Set write to priority 16 instead of the fallback or default, enable Set in Slot16 (Niagara) on the point. Configure that option from device details, device templates, or points batch update.- Adjusting temperature setpoints seasonally across the portfolio
- Releasing overrides so devices follow their schedules overnight
- Responding to peak demand by reducing setpoints by a set increment
- Disabling specific devices or systems during scheduled maintenance
Access mass write points
- Portfolio level
- Building level
- From the portfolio view, open
Mass Write. - Click
Pointsin the left-side menu. - Click
Write Pointsto start a new job or open an existing job from the list.
Selection and search
Only writable points appear in the mass write list. Points are not selected by default — select targets explicitly with row checkboxes. UseSelect all to include every point across all pages. After Select all, deselect individual exceptions as needed.
Use Filters to narrow the list by point type, canonical type, area, ontology field, data source type, and other attributes. To find non-templated points, set Ontology Field to Not Assigned.
Search supports three match modes — Starts with, Contains, and Exact — across these fields:
Grouped selection
Grouped view simplifies selection for large point sets, especially non-templated points. In grouped mode:- Points are grouped by name and kind.
- Each group shows the group name, point count, and device count.
- Expand a group to review the underlying point list with the same columns as the standard table.
- Select entire groups. You cannot include or exclude individual points inside a group.
Write points
Open mass write points
Mass Write, click Points in the left-side menu, then click Write Points.Filter buildings
Apply to load the available points.Filter and search points
Select points
Select all across pages. Deselect any exceptions.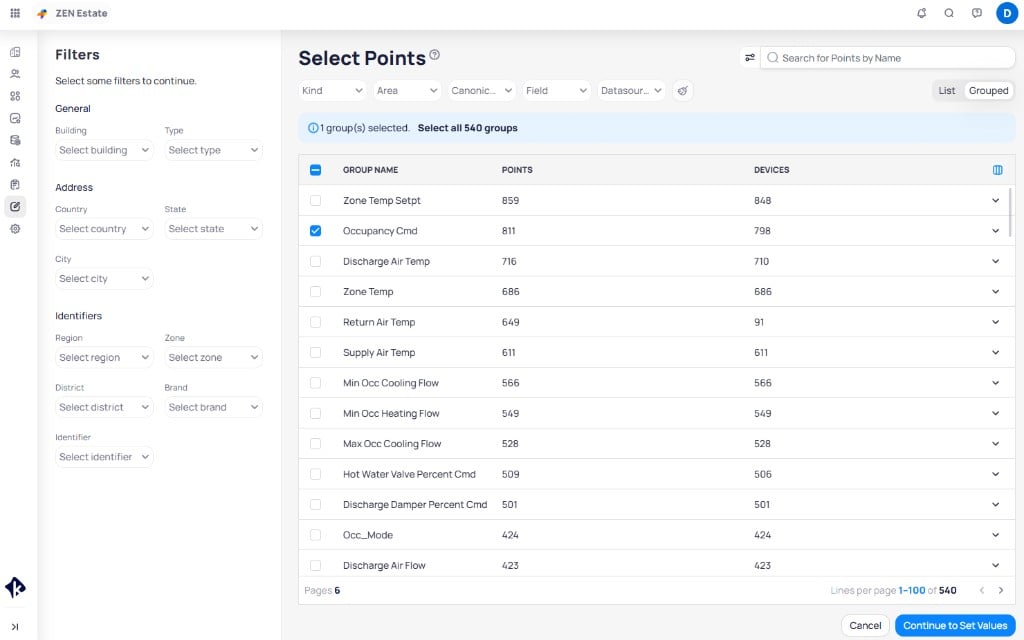
The Select Points page with building filters on the left and the point list on the right
Continue to Set Values when the selection is final.Configure the job
Set values for each group
Save for each group. Color highlights indicate missing information.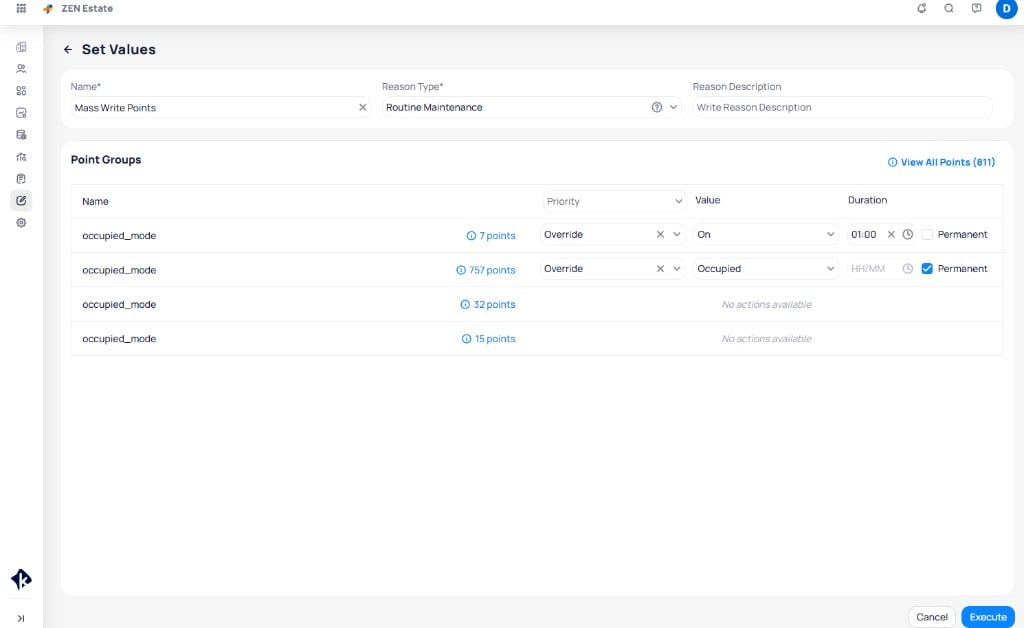
The Set Values page showing job details and point groups with priority, value, and duration settings
Execute the job
Execute. A confirmation dialog warns that changes are not reversible. Review your point selection, then click Proceed to start the write operation.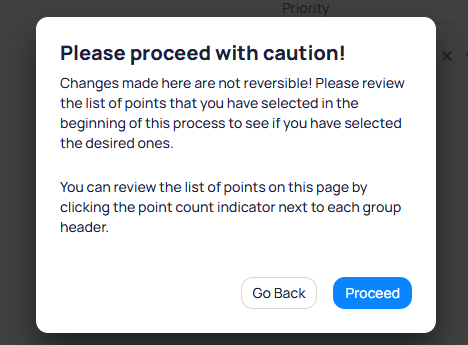
The confirmation dialog requires you to verify your selection before executing
Track job progress
The job details page shows:- Creator and creation time
- Total number of points processed
- Success and failure counts per group
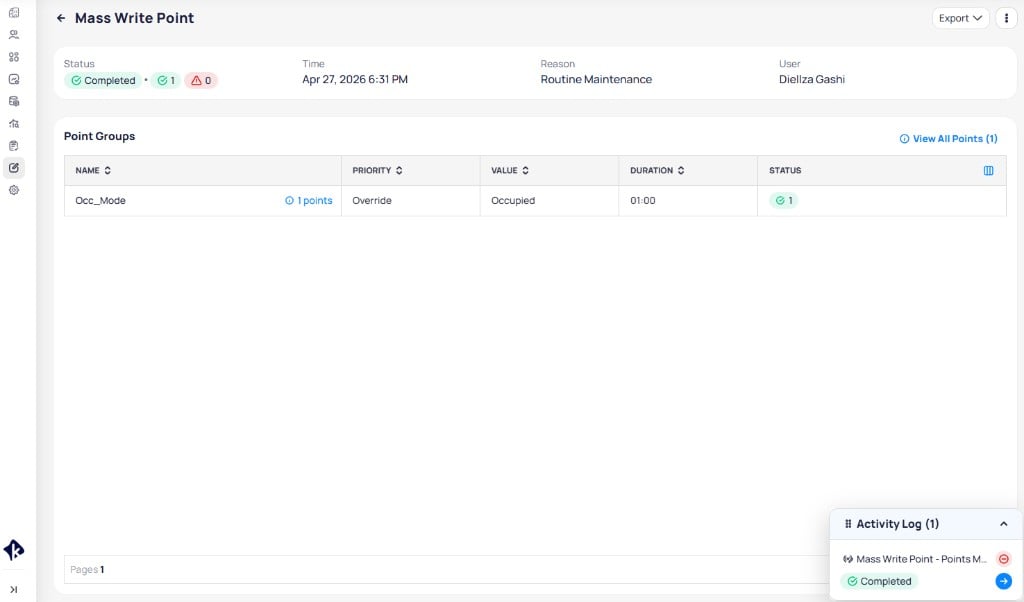
The job details page displays status, point groups, and an activity log of the write operation
Export button to download job results as CSV. Enter a File Name, choose which Columns to include, then click Export.
The CSV export includes Building ID, Building Name, Device ID, Device Name, Name, Field, Priority, Value, Duration, Status, and Failed Reason.
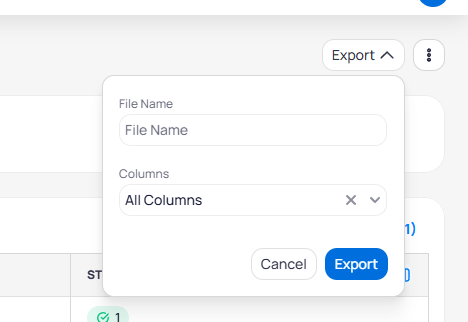
Export job results with a custom file name and column selection
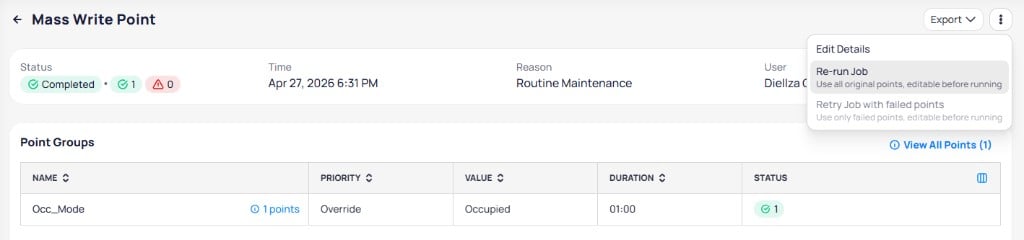
The job actions menu provides options to edit, re-run, or retry failed points
Mass write schedules
Use mass write schedules to update multiple schedules at once. Common scenarios include:- Changing start or end times across schedules for seasonal daylight shifts
- Updating operational hours based on new tenant contracts
- Adding holiday special events to multiple schedules simultaneously
- Implementing building-wide or portfolio-wide schedule changes after emergencies
Access mass write schedules
- Portfolio level
- Building level
- From the portfolio view, open
Mass Write. - Click
Schedulesin the left-side menu. - Click
Write Schedulesto start a new job or open an existing job from the list.
Selection and search
Every weekly schedule (excluding calendar schedules) appears in the list based on your filters. Schedules are not selected by default — select targets explicitly with row checkboxes. UseSelect all to include every schedule across all pages. After Select all, deselect individual exceptions as needed.
Use Filters to narrow by Kind, Current Status, or Data Source. Use the search bar to find schedules by name.
Toggle between List and Grouped view in the upper right.
Grouped selection
Grouped view simplifies selection for large schedule sets. In grouped mode:- Schedules are grouped by name and kind.
- Each group shows the group name and schedule count.
- Expand a group to review the underlying schedule list with the same columns as the standard table.
- Select entire groups. You cannot include or exclude individual schedules inside a group.
Write schedules
Open mass write schedules
Mass Write, click Schedules in the left-side menu, then click Write Schedules.Filter buildings
Apply to load the available schedules.Filter and search schedules
Select schedules
Select all across pages. Deselect any exceptions.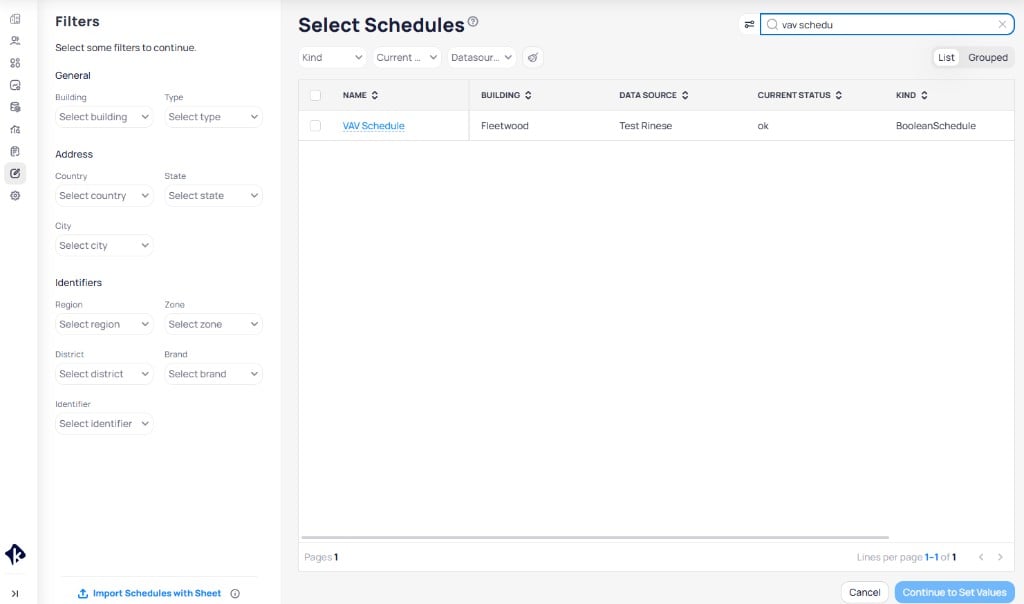
The Select Schedules page with building filters on the left and the schedule list on the right
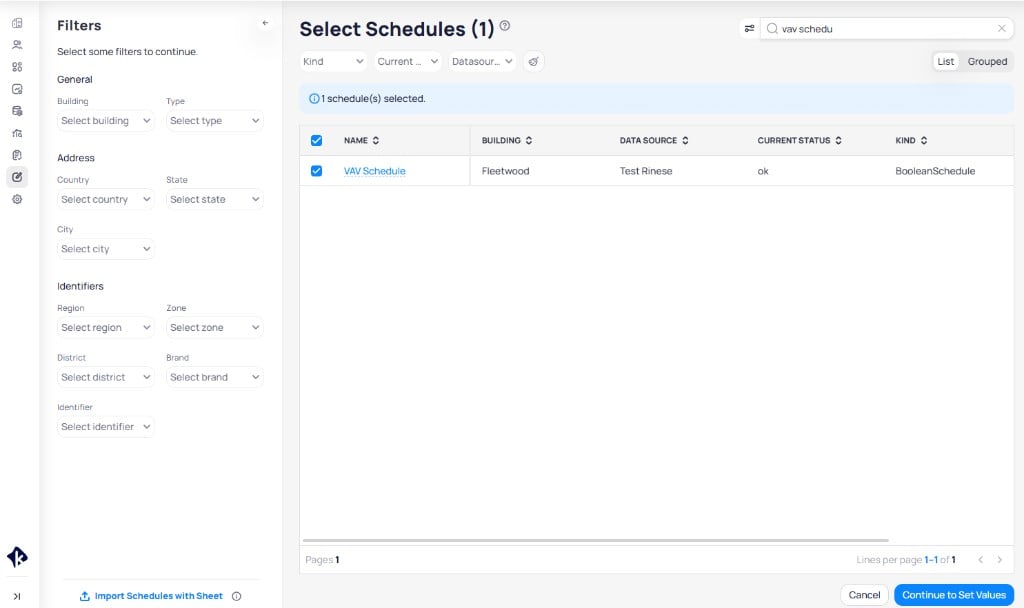
Selected schedules are highlighted and the header shows the selection count
Continue to Set Values when the selection is final.Configure the job
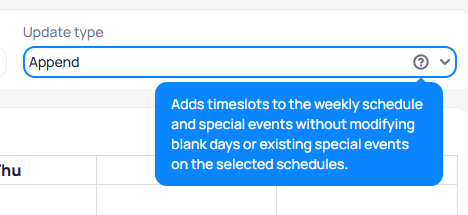
Append adds time slots without modifying existing schedules
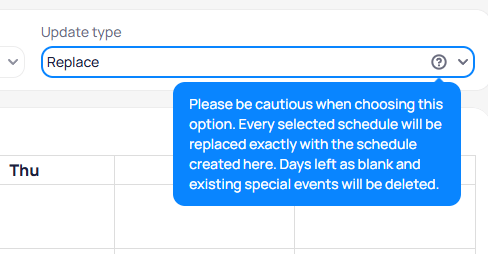
Replace overwrites selected schedules entirely — use with caution
Create the temporary schedule
Create Event, All Day Event, or Clear Week. Define the start and end times for each period.Timeslot creation and value assignment are separate steps, but both happen on the same page. Values appear after you click into a timeslot. Side panels open automatically to guide the next step, especially for special events.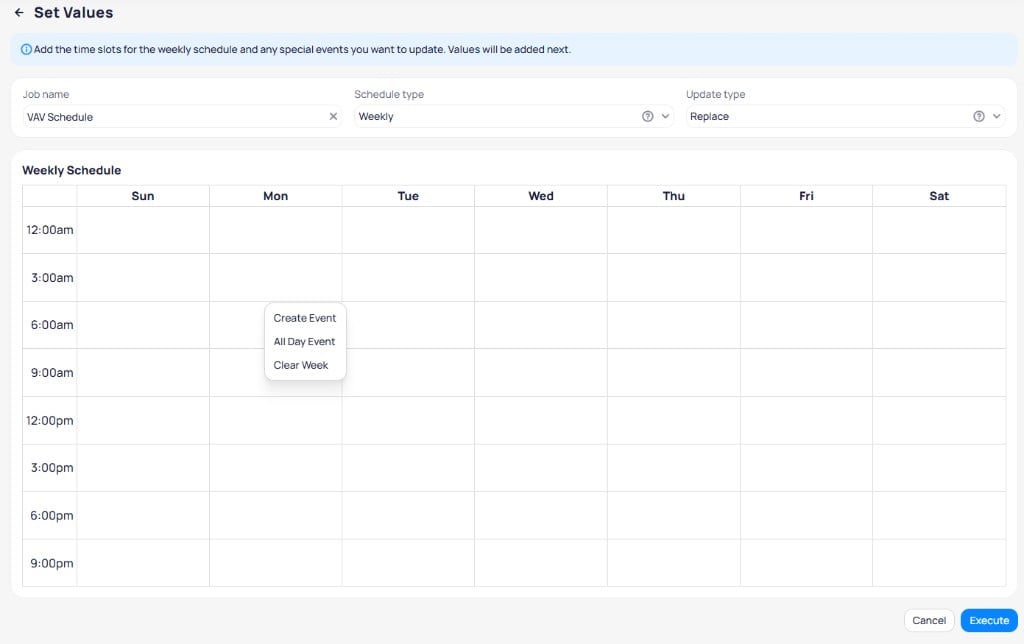
The weekly schedule editor with a context menu to create time slots
- If the update type is Append, these time slots are added alongside existing ones
- If the update type is Replace, all existing time slots are replaced with the ones you define here
- Days left blank are deleted from the selected schedules
Set values for time slots
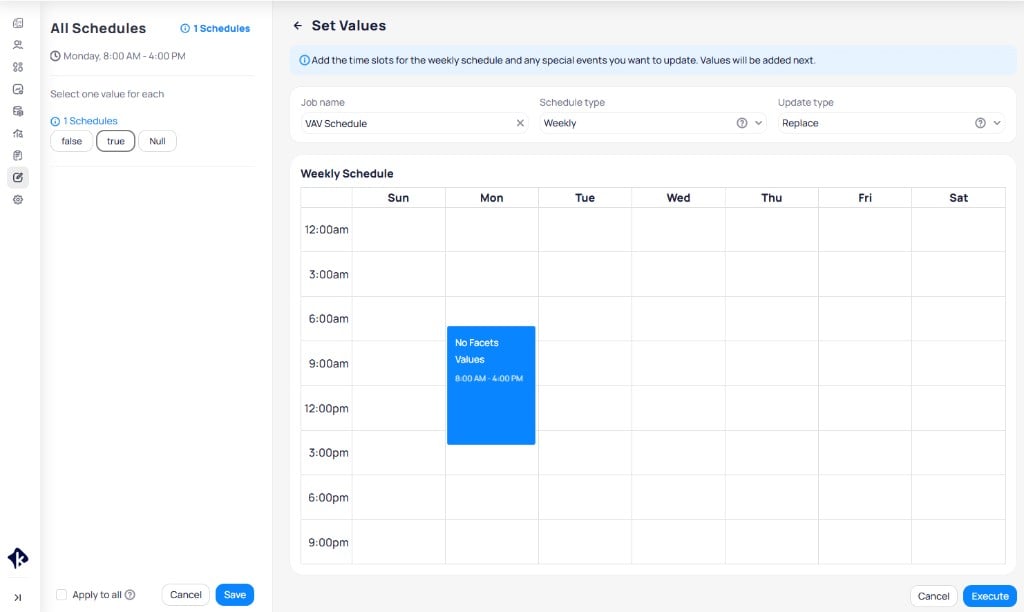
Click a time slot on the calendar to reveal the value assignment panel on the left
Apply to all to assign the same values across every time slot in the weekly schedule. Repeat for special events if applicable. Click Save at the bottom of the left panel.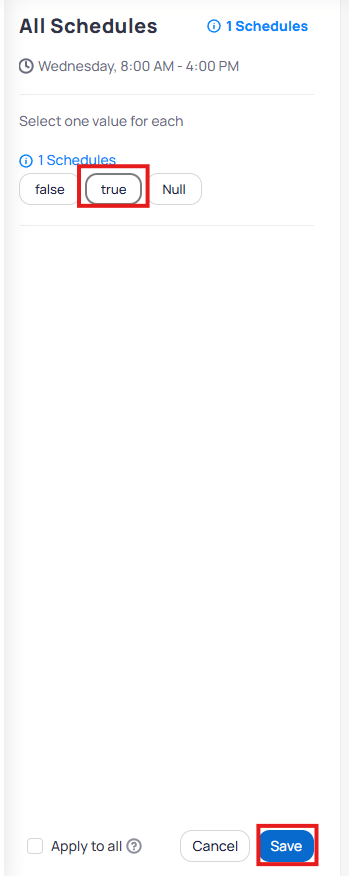
Select a value for each schedule group and click Save
Execute the job
Save at the top right (the button remains disabled until all time slots have assigned values). Cloud BMS updates every selected schedule and redirects you to the job details page.Track schedule job progress
The job details page shows the status, timestamp, schedule type, update type, and success and failure counts per group. The bottom section displays a preview of the weekly schedule with the applied time slots and values. An activity log tracks the execution history.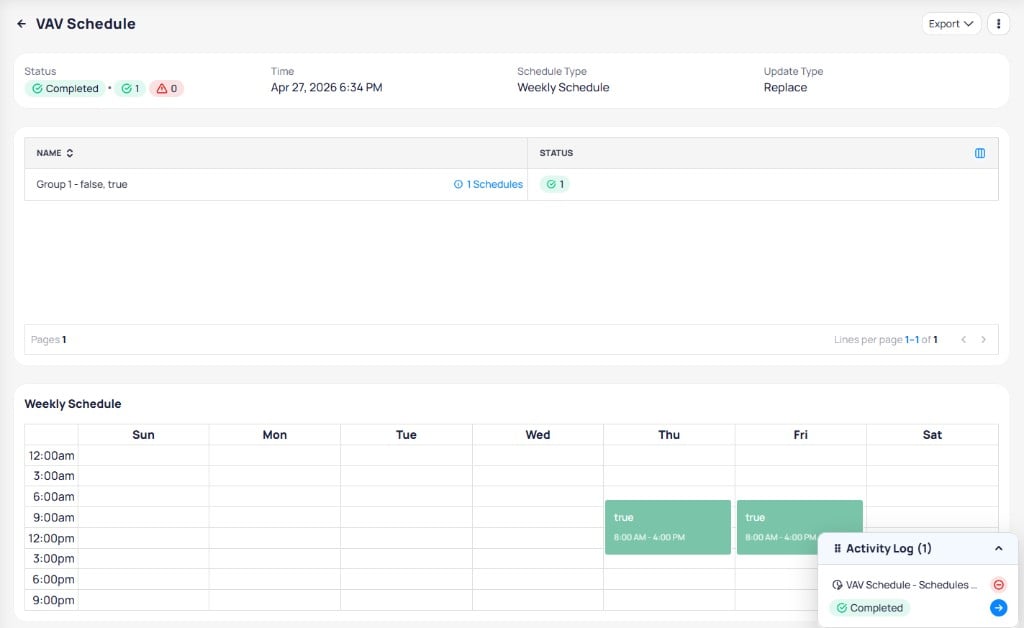
The schedule job details page shows group results and a preview of the applied weekly schedule
Export button to download job results as CSV. Enter a File Name, choose which Columns to include, then click Export.
The CSV export includes Building ID, Building Name, Datasource ID, Datasource Name, Name, Type, Kind, Connector Type, daily updates for Monday through Sunday when a weekly schedule is updated, Special Events, Status, and Failed Reason.
From job details, use the three-dot menu to:
Mass write schedules with sheet
For scenarios where each schedule requires different times or effective dates, you can import updates from a spreadsheet instead of configuring a single template schedule.Open the import dialog
Write Schedules flow, click the Import Schedules with Sheet button at the bottom of the left filter panel. A dialog opens with three steps: download the template, fill it out, and upload it.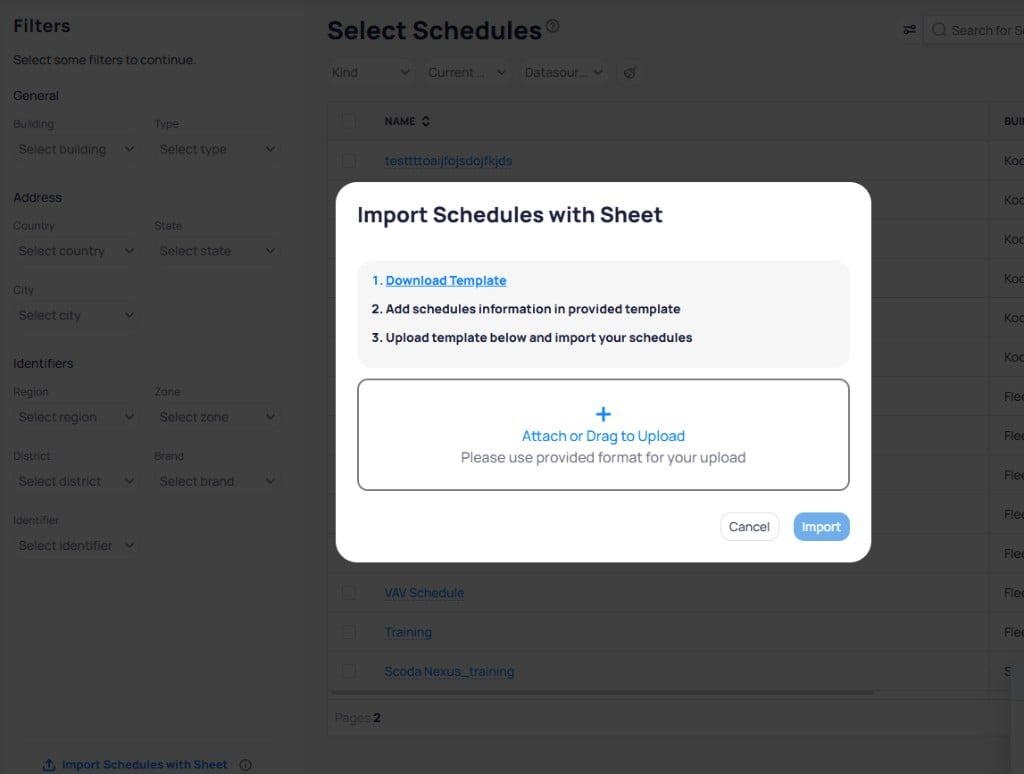
The Import Schedules with Sheet dialog guides you through downloading a template, filling it out, and uploading it
Download the template
Download Template in the dialog. The Excel template contains column headers for all required fields.Fill out the template
Upload the sheet and execute
Attach or Drag to Upload in the same dialog. Invalid or missing values are flagged during upload. Click Import to proceed.After import, Cloud BMS selects the stores matching the identifiers and displays the available schedules. Select the schedules you want to update and click Execute.