

Shared links
A shared link is a URL that lets people outside KODE OS, or without a signed-in session, view a dashboard or widget. Recipients get a read-only interactive view. They can use charts and filters but cannot edit the dashboard. Create a dashboard link from the dashboard three-dot menu →Share. Create a widget link from the widget three-dot menu → Share. Both use the same field set.
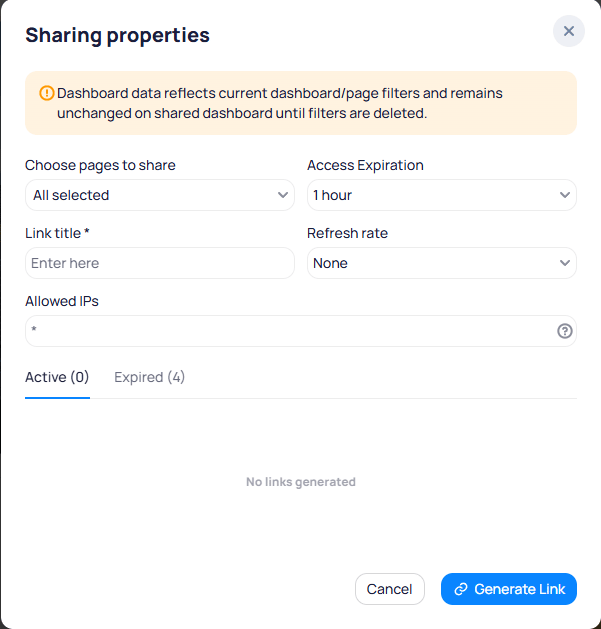
Sharing properties dialog with pages, expiration, refresh rate, and IP restrictions
Share fields
Select which dashboard pages the link exposes. Choose all pages or a subset.
Field
Set when access ends. Choose
Never for no expiration.Field
Label used to find and manage the link. Titles do not need to be unique.
Field
How often the shared view refreshes with new data. Defaults to
None. More frequent refresh uses more compute, so prefer longer intervals when possible.Field
Restricts access by IPv4 address. Leave blank or enter
* to allow all addresses. Only the dashboard owner can edit this field.IP address rules
Manage shared links
In Settings, use theActive and Expired lists. Edit or delete a link from the three-dot menu. You can also manage links from the Active and Expired tabs in the share dialog.
Scheduled reports
A scheduled report is a recurring PDF export emailed to recipients. Create one from the dashboard three-dot menu →Schedule PDF Report.
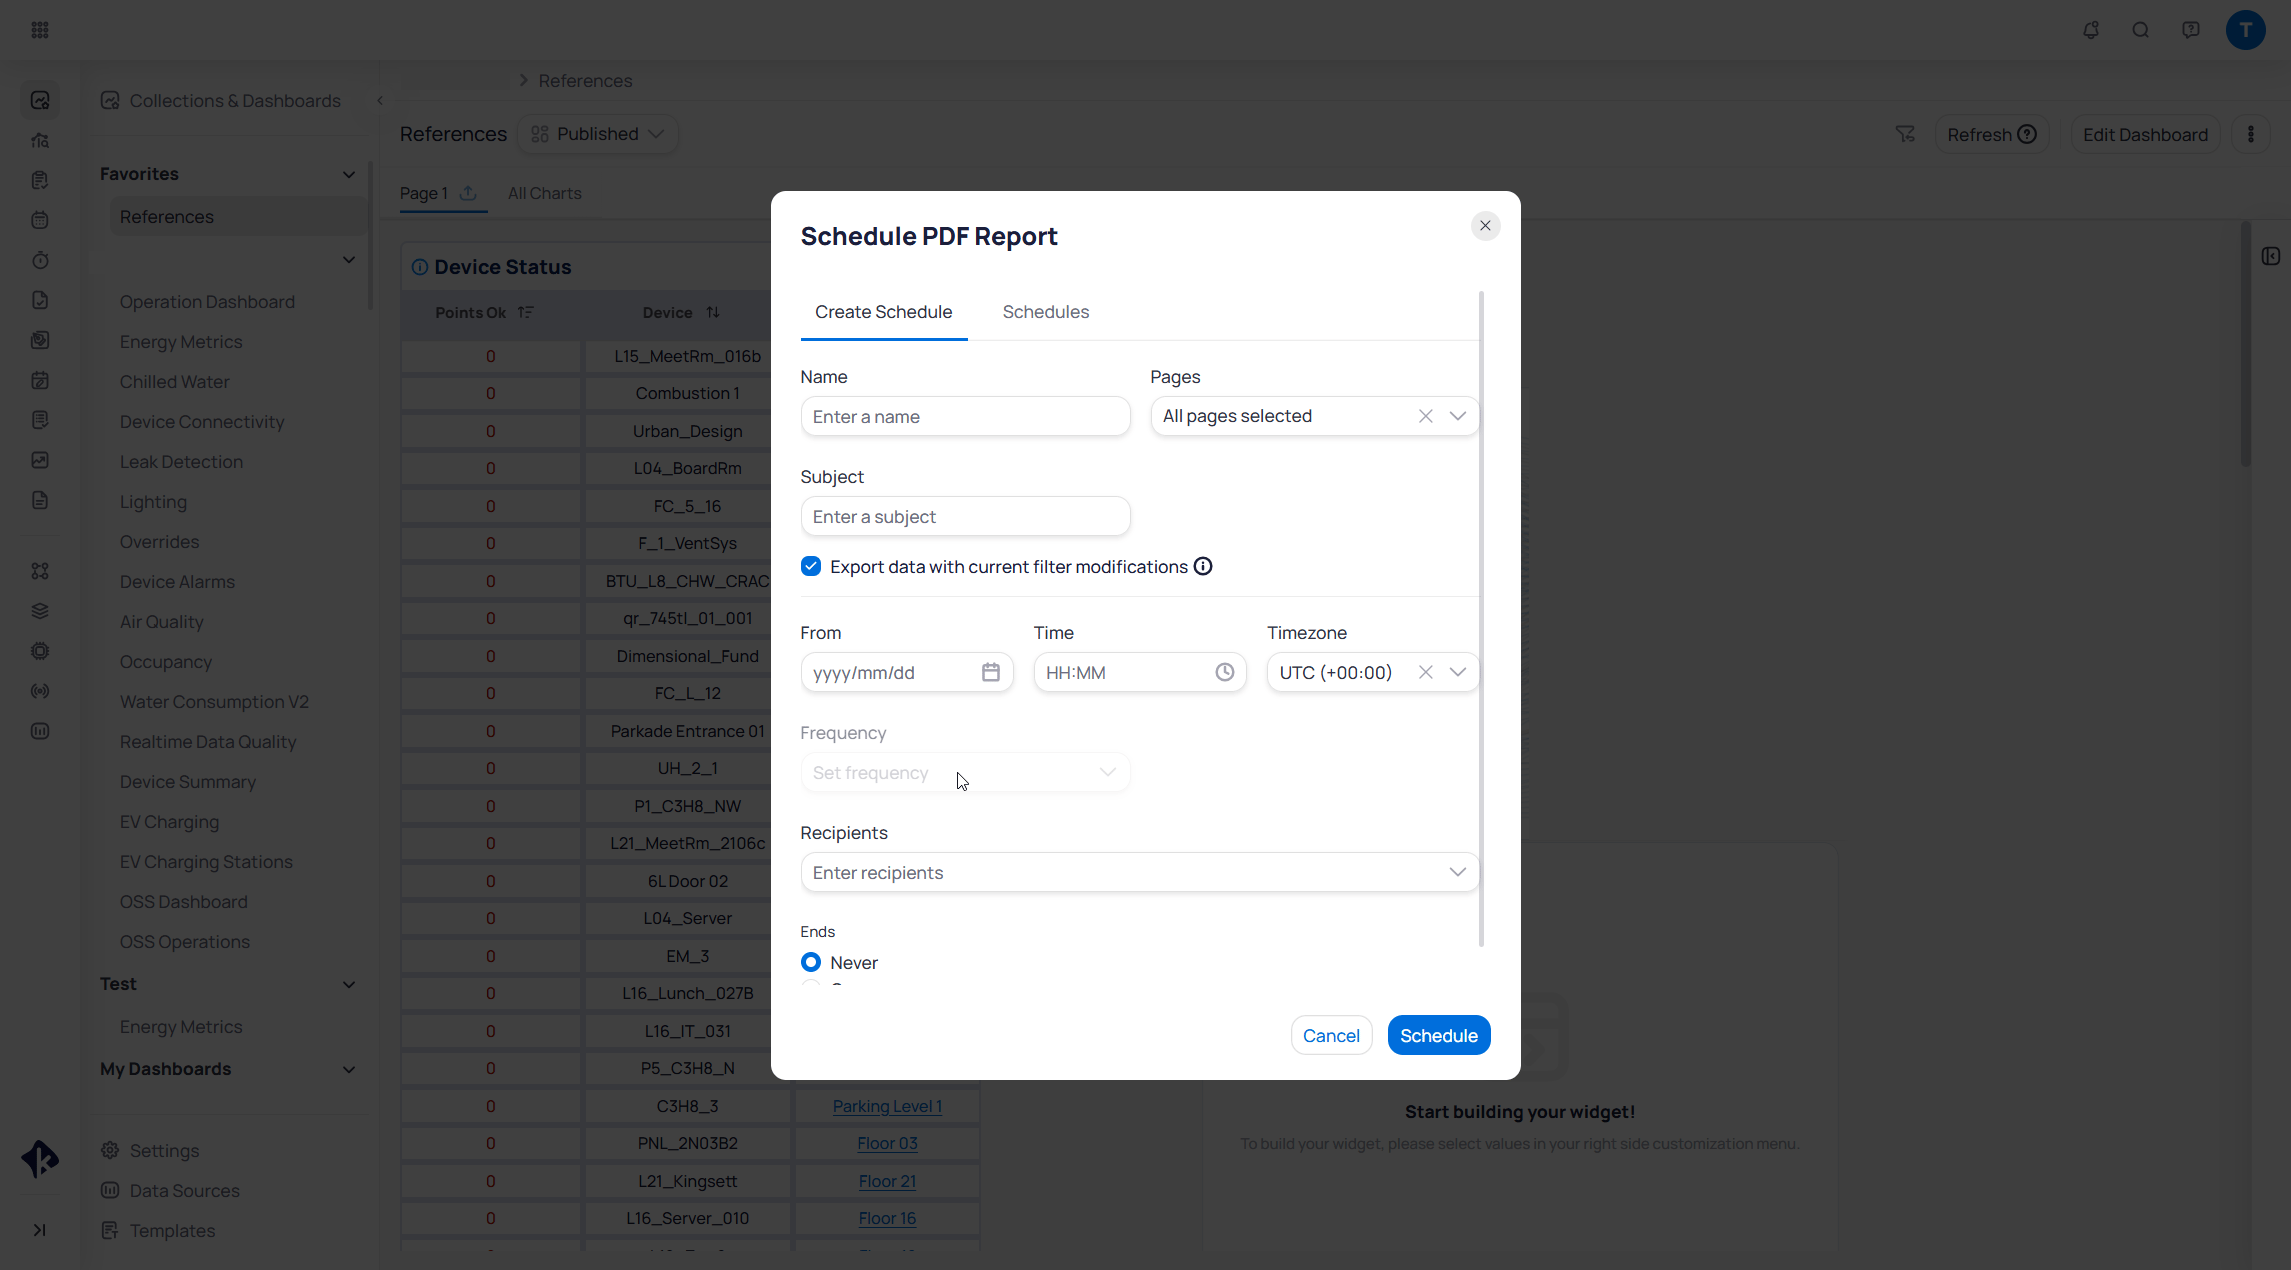
Schedule PDF Report dialog on the Create Schedule tab
Create a scheduled report
Create a scheduled report
- Open the dashboard three-dot menu and select
Schedule PDF Report. - On the
Create Scheduletab, complete the schedule fields. - Select
Scheduleto activate delivery.
Schedule fields
Field
Identifier for the schedule in Settings and the schedule list.
Field
Dashboard pages included in the PDF. Choose
All pages selected or specific pages.Field
Email subject line for each delivery.
Toggle
When enabled, the exported PDF reflects the current dashboard filter state. Pinned filters are not included.
Field
Sets the first delivery date, time of day, and timezone. Later sends follow this start time on the chosen frequency.
Field
How often the report repeats after the start time, such as daily, weekly, or monthly.
Field
One or more email addresses. Recipients must have a KODE Labs account.
Field
Choose
Never for an indefinite schedule, or On to set an end date.PDF export limits
Tooltips and dynamic filters often do not appear well in PDF output. Prefer layouts that show critical values without hover or scroll. Scheduled report emails include a PDF attachment and a live link to the dashboard.Manage scheduled reports
In Settings, use theEnabled and Disabled lists. Edit or delete a schedule, or toggle status to pause delivery before the end date. You can also manage schedules from the Schedules tab in the schedule dialog.
Next steps
Share dashboards and widgets
Create shareable links for live dashboard or widget views.
PDF exports and scheduled reports
Export PDFs and schedule recurring report delivery.
Settings
Manage shared links and schedules across your portfolio.
How permissions work
Understand view access, edit access, and collaborators.