

FTT from the left sidebar, select the three-dot menu at the top right, and choose Workflows.Workflows list
The workflows list displays all available workflows with key details. Use the search bar andCanonical Type filter to find specific workflows.
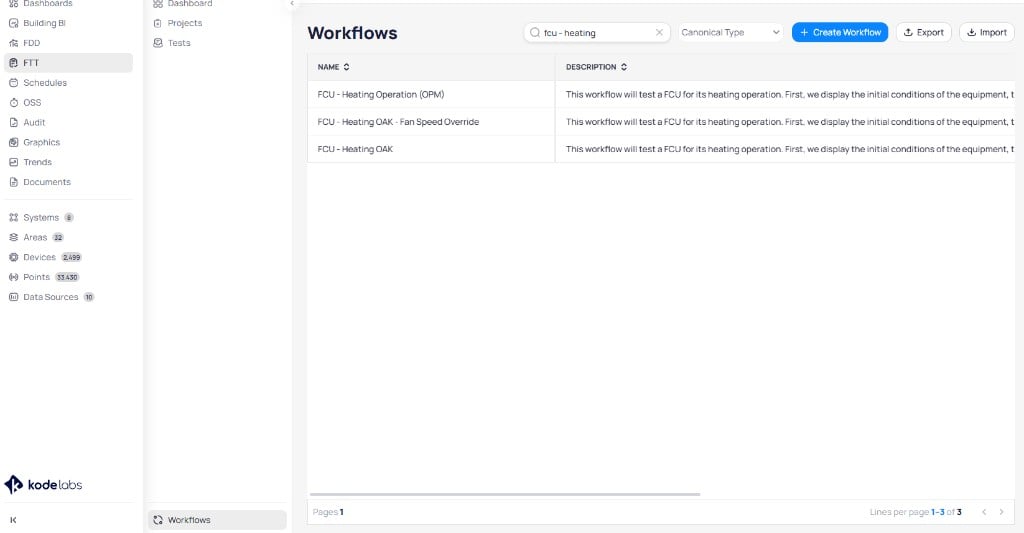
The workflows list with search and canonical type filtering
Row actions
Select the three-dot menu on any workflow row to access available actions: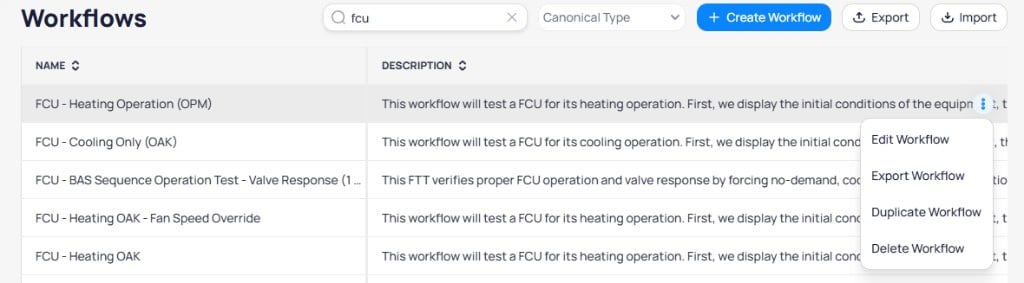
Row actions available from the three-dot menu on a workflow
- Edit Workflow: open the workflow in the logic builder
- Export Workflow: export the selected workflow as a JSON file
- Duplicate Workflow: create a copy of the workflow
- Delete Workflow: permanently remove the workflow
Export workflows
Export workflows to share them across sites or create backups.- Select
Exportfrom the top toolbar. - Select the checkboxes next to the workflows you want to export.
- Select
Export. The workflows download as anFTT Export.jsonfile.
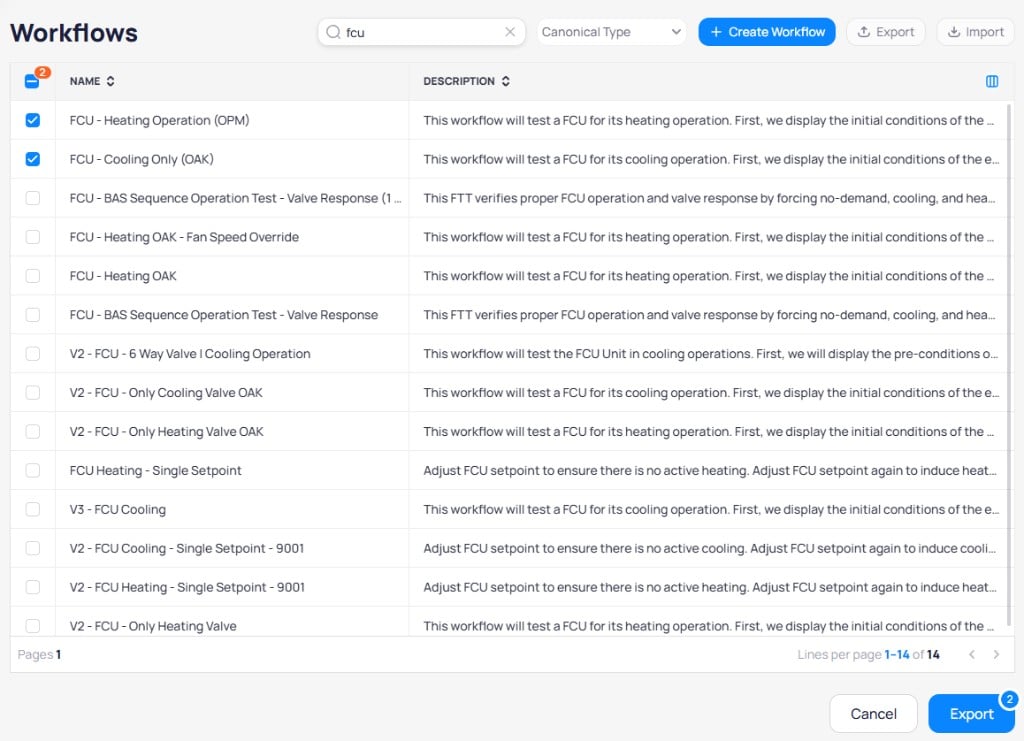
Select workflows to export with checkboxes, then select Export
Import workflows
Import workflows from a previously exported JSON file.- Select
Importfrom the top toolbar. - Choose a file or drag and drop the JSON export file into the upload area.
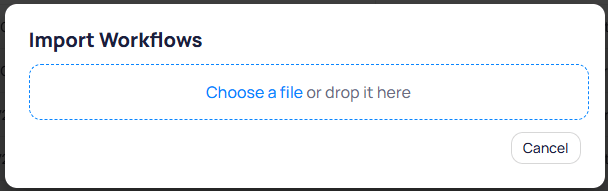
The Import Workflows upload dialog
- Review the imported workflows. Use the search bar and
Canonical Typefilter to find specific workflows. - Select the workflows you want to import. For each workflow, choose whether to Replace an existing workflow or create a new one.
- Select
Importto complete the process, orDiscardto cancel.
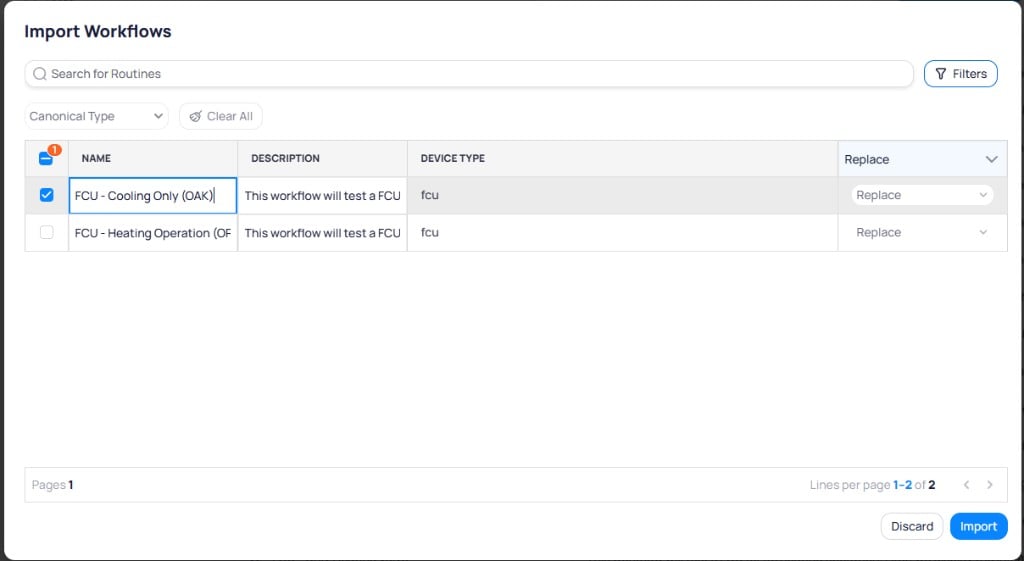
Review imported workflows and choose Replace or create new for each
Create a workflow
Set workflow details
+ Create Workflow. Complete the required fields on the Workflow Details tab: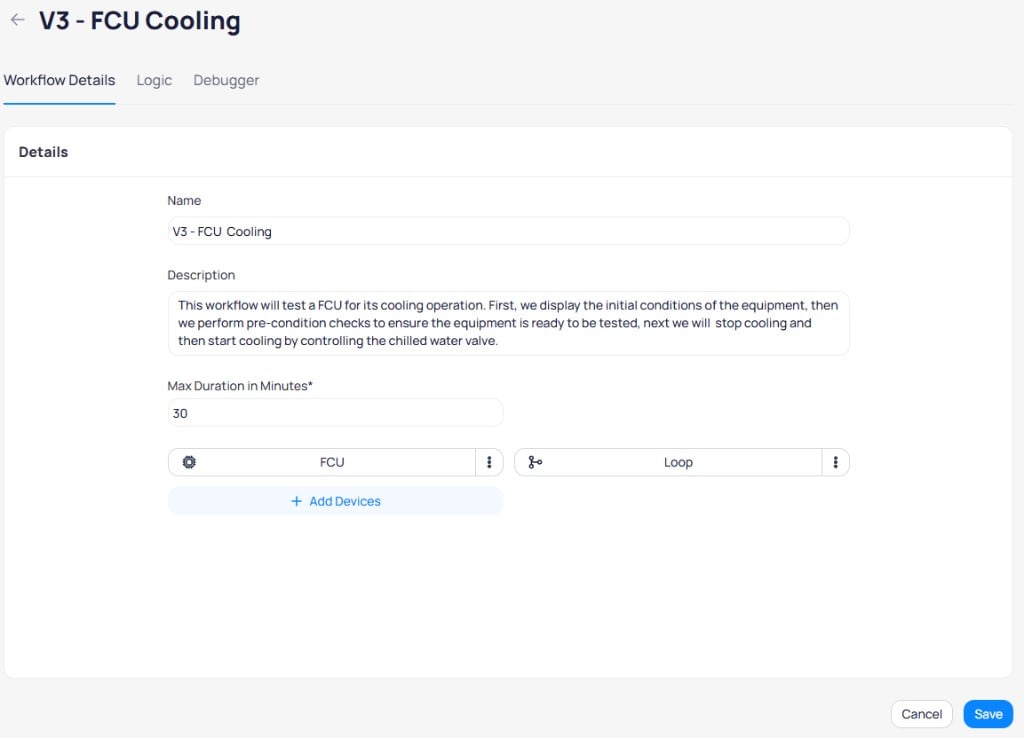
The Workflow Details tab with name, description, max duration, and device configuration
+ Add Devices to configure the base and reference devices for the workflow. Set the device name, select canonical types, and choose the required entities.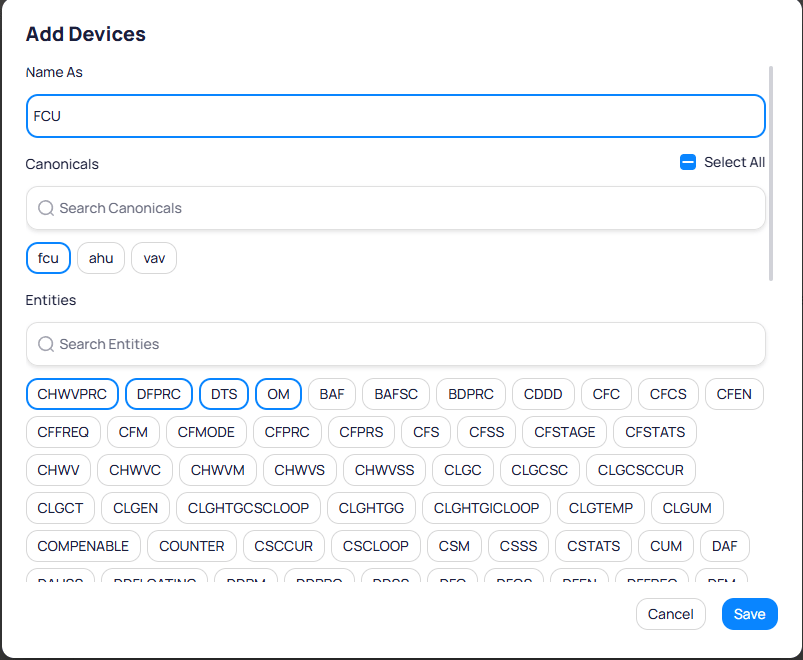
The Add Devices dialog for configuring canonical types and entities
Build the logic
Logic tab. Drag and drop logic blocks from the left panel onto the canvas to build the testing sequence.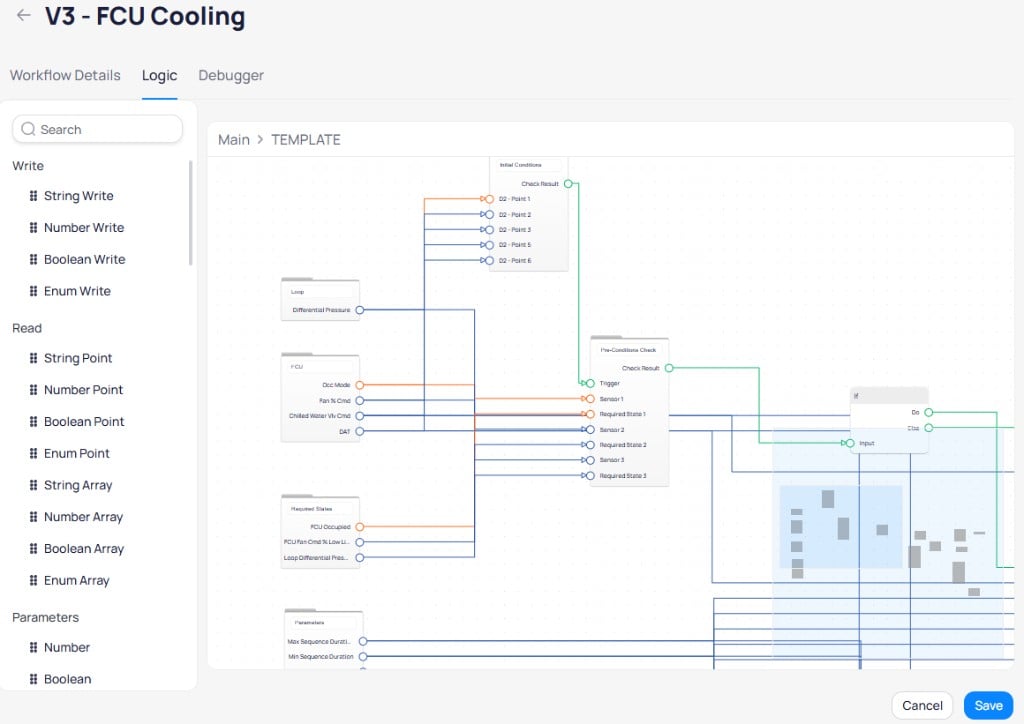
The Logic tab showing the visual workflow builder with connected blocks
- Initial conditions: print the starting state of the equipment
- Pre-condition checks: verify the equipment is ready for testing
- Control sequences: command the equipment and evaluate responses
- Release: end the test and release all overrides
Test with the debugger
Debugger tab. The left sidebar displays parameters and inputs. The main screen shows the simulator output.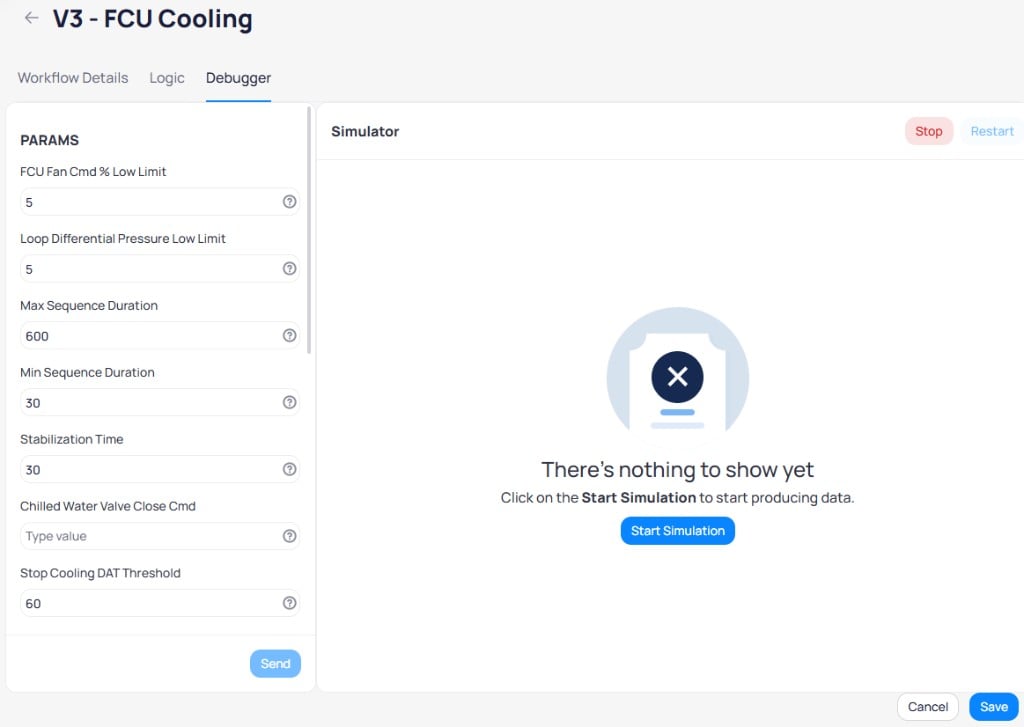
The Debugger tab with PARAMS panel and Start Simulation button
- Review the
PARAMSsection and adjust parameter values for testing. - Select
Start Simulationto begin.
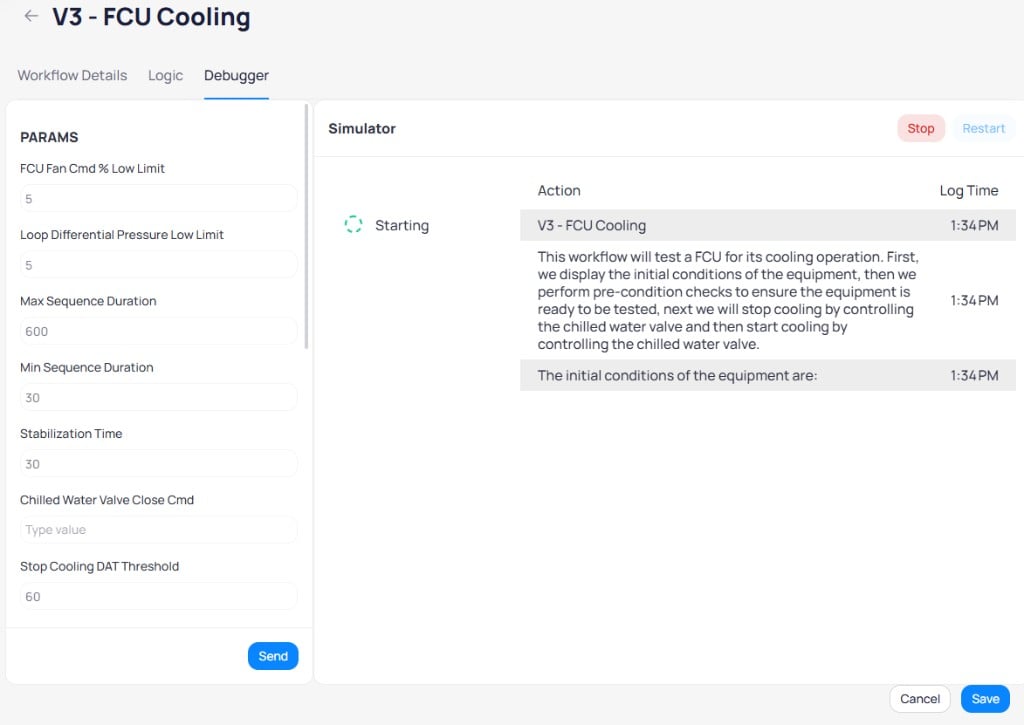
The simulator running a workflow showing the starting phase and initial conditions
- Update
INPUTvalues to simulate different equipment conditions, then selectSend.
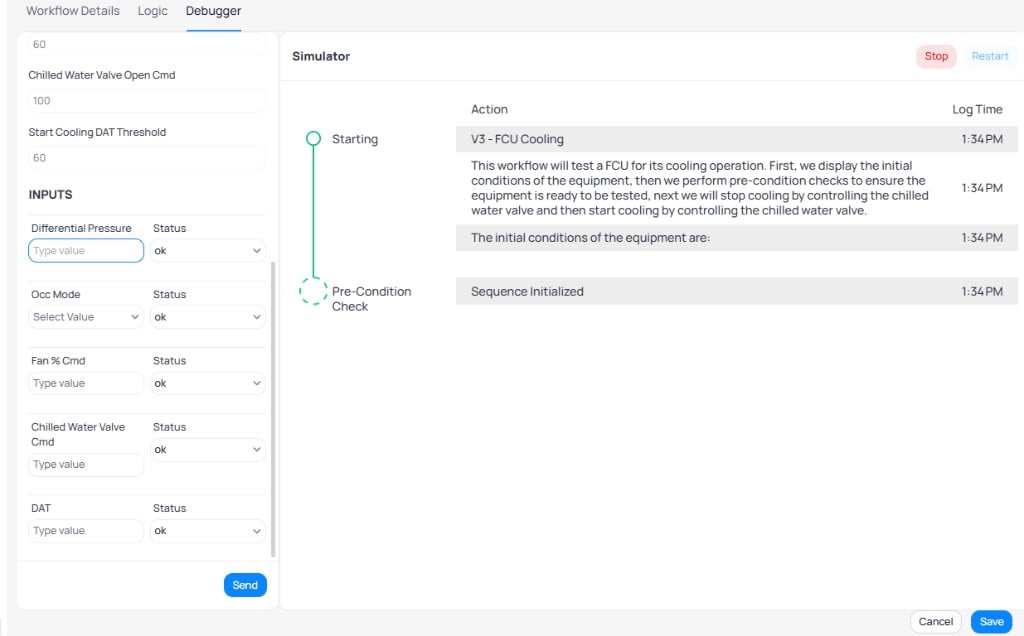
The INPUTS panel with sensor values and status dropdowns during a Pre-Condition Check
- Verify the workflow produces the expected response for each scenario.
Save the workflow
Save. The workflow appears in the workflows list and becomes available for use in FTT projects.